Catherine Pooler Winter Release Blog Hop!


Hey there, Crafters!

The newest Winter Release from Catherine Pooler is available in the shop now, and we've got a fantastic blog hop lined up to showcase all the fantastic products! My first two cards use the Snowy Day Bundle and the third card uses the Cake and Confetti Bundle.

Our first card incorporates the Geometric Flakes Cover Plate Die, and it's super easy to use!


Start off by creating a wintery background of your choice. I created an alcohol ink background panel for this card, but you could definitely incorporate a different technique!


Then, cut out a 4.25 x 5.5 inch card panel and use the cover plate die to create the front panel. Apply Versamark ink all over the die cut panel and then cover with embossing powder. Glue the panel on to your background panel to complete the entire finished panel combination. Stamp a sentiment on to a strip of vellum cardstock and then wrap that sentiment strip around the panel piece and glue the ends of the strip together on the back of the panel piece.


Adhere that completely finished panel piece on to a cut and scored 4.25 x 5.5 inch card base, and you're good to go!


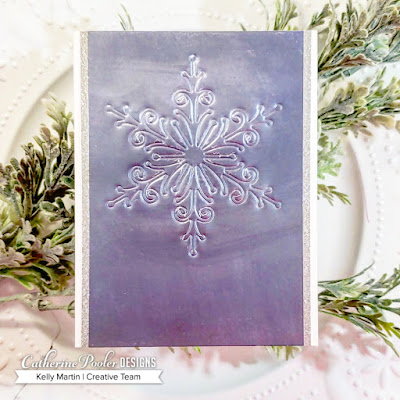
For the next card, you can pull out a great technique that I often forget about--dry embossing! Dry embossing combined with metallic cardstock creates a really classy look!


Cover a 4.25 x 5.5 inch card panel with Nuvo Tonic Embellishment Mousse using an ink blending tool. Place your Delicate Snowflake die on to your cardstock and run it through your die cutting machine on the embossing setting. Don't forget your embossing mat!!


To finish off your card, trim down your metallic panel and glue it flat on to a cut and scored 4.25 x 5.5 inch card base. I also added two strips of silver glitter cardstock that I had in my stash. This helped give it a finished edge, but you can use whatever paper you have in your stash!


Now, let's move to the Cake and Confetti Bundle!

Don't you just love patterned paper?? It's no secret that I hoard it BIG TIME. (If you've read any of my previous blog posts where I incorporate patterned paper, I usually take at least 45 minutes to wax eloquent on my love for patterned paper.) But the paper from this Cake and Confetti Bundle is just everything I love about patterned paper. The patterns are so fun and have a cute "doodle" look. There's a DELICIOUS plaid pattern and I love all the color combinations. 


One of the things I love about patterned paper is that it really does so much of the work for you. You can create a great looking card without spending a ton of time. So let's get to it!

Start out by cutting and scoring a 4.25 x 5.5 inch card base and set it aside. 

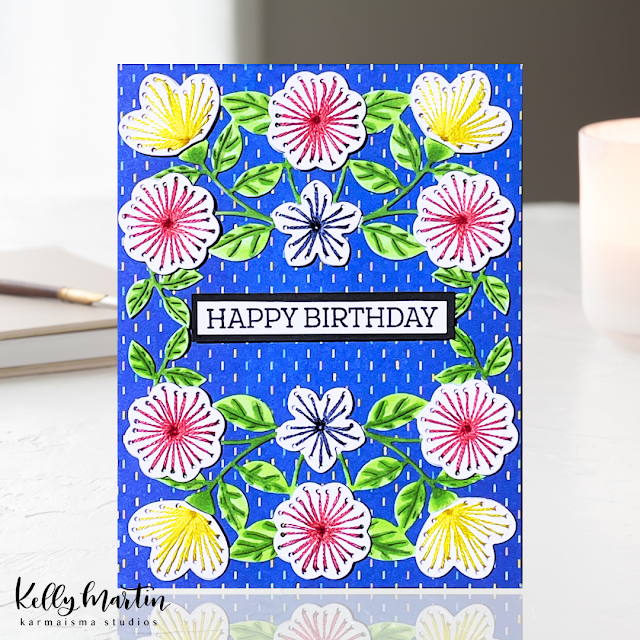
Stamp out some of the candle images from the Birthday Icons set and then color them using whatever medium you like! I used my Catherine Pooler Inks and the Ink Blender Pen. One of the reasons I did this was because the patterned paper in this collection is made to coordinate with the inks in the Carnivale Collection. 

After you finish the coloring, trim down the images and mount them on to black cardstock to give a finished matte edge. Set those elements aside to incorporate the patterned paper on the card base. 


Trim down a piece of the patterned paper and glue it on to your card base, leaving the bottom portion exposed. Use a scrap piece of white cardstock and cover it with ink to create a coordinating strip to glue next to your patterned paper piece. This process will give a finished edge to your card base--just be sure to leave room at the bottom for your sentiment!

Mount the matted candle image elements with foam tape and then place them on to your card base, and then stamp your sentiment at the bottom of the card to finish everything off!

And now take a second to admire the three FABULOUS cards you just made with minimal supplies and effort! 


We're having a fun blog hop so you can take a look at all the fabulous products in action! Hop along to each blogger and leave a comment on each post for a chance to win a $25 Gift Certificate to the Catherine Pooler Shop! Winners will be announced on Monday evening, December 17 on Catherine's blog. 

Blog Hop Order:

2. Kelly Martin (you are here!)
3. Jen Carter (go here next!)

 Thanks again for stopping by the blog today and be sure to check out the entire new release bundles here.

Supplies Used:

Stamps: Birthday Icons, Good Vibes Border (Tropically Yours Stamp of Approval), Milestone Birthday Sentiment, Peaceful Flakes
Alcohol Inks: Amethyst, Patina, Pool
Embossing Powder: Neptune, Liquid Platinum


All The Trimmings Release Blog Hop!


Welcome, crafty friends!

Thanks for stopping by today!

Are you ready for another great release from Catherine Pooler Designs??? You can find the entire release here.

Let's get right to the cards!

Christmas is a perfect time for patterned paper, am I right?!

You can combine different sheets of patterned paper at different angles to create a whimsical and fun look, and that's what I did for this first card.


Cut and score a 4.25 x 5.5 inch card base and then adhere your pieces of patterned paper at whatever angle you want on to your card base. Then trim off the edges!

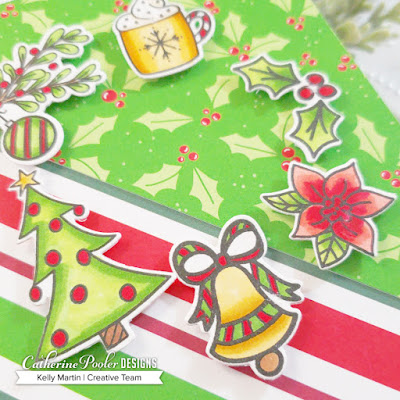
Color the images from the Holiday Charm stamp set using whatever coloring medium you want and then cut them out using the matching dies. You can then arrange them in a wreath-type pattern on to your card by adhering them with foam tape.


For the next card, the key is to stay calm! :) So if shaker cards aren't your thing, then just use the beautiful dies in the Snow Globe set to make a nice scene!


Use the dies to cut out several pieces and then "color" them using various Catherine Pooler inks. Just lay the pieces on to your work surface, and press the ink pad on top of them. Here's a tip for creating the sky and ground: Just cut wavy lines on to a scrap piece of paper and use that for your mask! 

You can also create the look of snow by using a fun snow marker pen!

After that scene is done, just glue it on to the base, and you've got yourself a completed snow globe! I blended some ink around the edges of the base as well, just to give it a more textured wooden look.


Cut and score a 4.25 x 5.5 inch card base and set aside. Ink up the background flourish stamp with a neutral colored ink and then lay your card base front on the stamp and press down firmly to apply the image to your card base. 

Adhere the entire snow globe piece on to your card base and you're all set for holiday goodness!

Now let's get to the blog hop details and the PRIZES!


Hop along to each stop and leave a comment for your chance to win a $25 gift certificate to the Catherine Pooler shop! The winner will be announced on Monday evening on Catherine Pooler's blog.

6. Kelly Martin (you are here!)
7. Tracie Pond (go here next!)

Thanks again for stopping by today and happy hopping!

Kelly

Supplies Used:


Heffy Doodle Release Blog Hop!


Hello, Crafty Friends!

Thanks for stopping by today to join the fun for the newest Heffy Doodle release! 

I've got a colorful project for you today that uses one of the new stamp sets and one of the new stencils in the release. So let's dive right in!


I broke out my Distress Oxide inks and used the Heffy Doodle tape to adhere my stencil on to a piece of cardstock. Using an ink blending tool, I blended my oxide inks in a rainbow order on to my card panel. 


I stamped my images on to white cardstock and then colored them in with copic markers. I used a circle die to cut out the area of the panel with the images on it and then glued fun foam to the back. I adhered it to my rainbow card panel (off to the side), and then trimmed off the edge. I then created a black frame using two of the circle dies and black cardstock and then glued that down to the panel for a finished edge.


I adhered the panel on to a cut and scored 4.25 x 5.5 inch card base and stamped a sentiment on to a scrap strip of cardstock. I adhered that sentiment strip on to the card to finish everything off! For added detail, I added some dots with a white gel pen which made the little veggie images even more adorable (if that's even possible!)


Now...It's time for prizes!

Hop along to each blog post on the list and leave a comment for a chance to win a fantastic prize! Comments must be left by 11:59 PM PST on October 22nd, 2018. Winners will be announced on the Heffy Doodle blog by October 24th, 2018. 

Blog Hop List:

Kori Wiskman
Kelly Martin (you are here!)
Ali Farmer (go here next!)
Heather Hoffman
Sindhu Prajay
Cassie Tezzak
Tallie Clewley
Franci Vignoli
Dennice Watts
Jessica McAfee
Isha Gupta


Here's an additional awesome promotional that Heffy Doodle is running right now, too! Spend £30 to get a free Dinky Dino stamp set. If you spend £45, you can get the stamp and the die set for free! 

Thanks again for stopping by today and happy hopping!

Kelly

Supplies Used:

Stamps: Veggie Patch 
Inks: Picked Raspberry, Fossilized Amber, Twisted Citron, Salty Ocean (Distress Oxide)

Home For the Holidays Release Day!


Hey there, crafters!

Today's the day you've been waiting for!

The new Stamp of Approval collection is now available for purchase over at the Catherine Pooler shop! 

You can very easily re-create this card that I'm sharing today, so let's get right down to it!

Start out by cutting and scoring a 4.25 x 5.5 inch card base. Go ahead and decide what you're going to do for the sentiment now, because in order to keep this card one-layer, I had to mask off the bottom area for the sentiment right away. 


After I masked off the sentiment area, I used the Cozy Borders set and alternated the images and inks to create this background pattern.


Once I was finished with the background stamping, I stamped a sentiment and then added a small image from the Festive Trimmings set.

For a finished edge, I laid down a small strip of double sided tape right above the sentiment and then applied some foil over the double sided tape, using a bone folder to rub in the foil on to the tape strip.

Thanks so much for stopping by and I hope you're heading over to the Catherine Pooler shop RIGHT NOW to go get your collection before they sell out!

Kelly

Supplies Used:
Stamps: Holiday Mix, Cozy Borders, Festive Trimmings
Inks: Peppermint Scrub, Eucalyptus, Midnight, Sand Castle
Accessories: Thermoweb Deco Foil in Platinum

Home for the Holidays SOA Release Blog Hop!


Welcome, Friends!

Thanks so much for joining me today as we take a look at the newest Stamp of Approval collection from Catherine Pooler Designs.

Every release keeps getting better and better--and this one is no exception!!

First a couple details about the Stamp of Approval collection. This is an exclusive collection and the products were designed specifically for the box. The items in the box are BRAND NEW, and they won't be available separately to purchase for several months. You'll need to subscribe to the waitlist first so you can get the notification to get first dibs on the sale. And these collections usually sell out VERY quickly, so don't delay! Get on the waitlist here.

Let's get to the cards!

I love clean and simple cards. I'm telling you guys--these make such an impact with minimal effort.


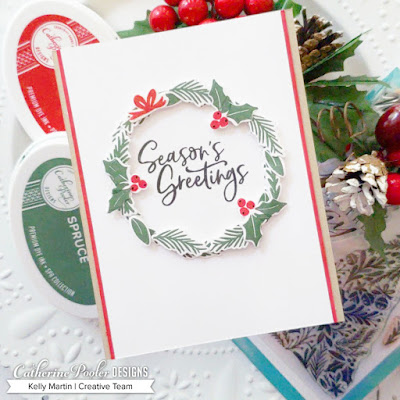
Start out by stamping the images from the Festive Trimmings set on to white cardstock. Cut them out, (using the matching dies), and then glue them on a card panel in a wreath pattern. To add further dimension and variation to the wreath, choose some pieces to glue flat on the card and then others to mount with foam tape before placing them down on the card panel.

After the wreath is finished, stamp a sentiment in the middle of the wreath to finish off your panel.


Now it's time to assemble the card. Cut and score a 4.25 x 5.5 inch card base made with Sand Dunes cardstock. Trim down your wreath card panel on the long sides by just a bit and glue on to the middle of the card base. For an added "finished" look, trim down two small strips of white cardstock, and cover them with red ink. Glue the strips on to the card, placing them up against the white panel that has the wreath on it.

Now we're on to the next card, and please--try to keep your stomach from growling as you look at this card. I DARE YOU!!


Start out by cutting and scoring a white piece of cardstock down to a 4.25 x 5.5 inch card base.

Use the Christmas Cookies die set to cut out the round cookie pieces from white cardstock. Cover the circle pieces with Sand Castle ink and then use a sponge dauber to apply Over Coffee ink to the edges of the cookie pieces, giving them that "baked to perfection" look.

Choose some of the cookie images and stamp them on to white cardstock and use the matching dies to cut them out. Glue those cookie images on to the brown cookie pieces and then mount them with foam tape before placing them on the card base.

Stamp the sentiment in the lower right hand corner, using the matching Over Coffee ink from the cookies.


Now, you can choose whatever image you want to fill in the empty spaces on the card! I chose the holly berry images from the Festive Trimmings set.

On to the blog hop details!


Hop along to each post on the list below and leave a comment for your chance to win a $25 gift certificate to the Catherine Pooler shop! The winners will be announced September 24th on Catherine's blog. 

2. Kelly Martin (you are here!)
3. Lisa Harrolle (go here next!)

Thanks so much for stopping by today and happy stamping!

Kelly

Supplies Used:


Heffy Doodle + Simon Says Stamp STAMPtember Release!

Hey Friends!

Oh my goodness, the excitement cannot be contained!!

It's STAMPtember! And Simon Says Stamp is collaborating with Heffy Doodle on an exclusive stamp set that's being released today!


The stamp set is called "More Than S'mores" and as you can see, it basically has all your fall favorites covered, am I right?!

I created a card for today's post and I hope you get inspired to drop your dollars for this one-of-a-kind set. 


I began by using a Birth Tree Window die and cutting it out of a piece of watercolor paper. After I'd created my window piece, I broke out my Distress Inks and painted the scene. I was feeling inspired to create a dusk/sunset type sky and ground, so I used some deeper shades of blue and green to achieve that look. 


I then stamped my images on to copic friendly cardstock, colored them, and fussy-cut them out. I glued them on to my watercolored piece and then glued that whole piece on to a cut and scored card base. 

I finished off the card by stamping out the two sentiment phrases on white cardstock strips and then glued those strips down on my card. 

Thanks for stopping by today and you can find this adorably exclusive set here WHILE SUPPLIES LAST!!

Happy Stamping!

Kelly

Supplies Used:

Dies: Birch Tree Window (Simon Says Stamp)
Stamps: More Than S'Mores (Simon Says Stamp)
Inks: Distress Inks in Evergreen Bough, Ground Espresso, Chipped Sapphire, Blueprint Sketch, Broken China, Peeled Paint 
Copics: C1, C3, C5, E50, E53, E55, E57

Back to Basics with Catherine Pooler!


Hey Friends!

The Catherine Pooler genuisues are hosting a super fun event right now, and I'm here to tell you all about it! 

You can find the awesome videos in the Back to Basics series here and you can read all about the series here , but basically the big idea behind this series is to encourage cardmakers not to forget their basic stamping and cardmaking skills! Sometimes we tend to get bogged down with pressure to create these really elaborate cards, but often times--a clean and simple card with just the basics has the most impact!

Today's card utilizes one simple technique: masking. Everything else is really basic and easy!


Start out by cutting and scoring a 4.25 x 5.5 inch card base. 

Use a piece of masking tape, washi tape, or even a post-it note to mask off the right side of your card, and then using the different pattern stamps in the For Everything set and rainbow colors of CP inks, stamp your border section on the left side of the card. 

After you've finished creating your left side, you can take off your masking component and then stamp a simple sentiment and image in the bottom right corner of the card. 

I chose to add a strip of gold glitter paper to my card, and I also mounted an additional panel with fun foam and glued it on to the card, just to give some added dimension and interest. 


So shush your internal voice telling you that your cards have to be really complex and go back to the basics! To add some fun to the series, the Catherine Pooler shop is offering a super fun sale!


Run over to the shop and stock up on some essentials to get your crafting mojo back!

Thanks for stopping by today!

Kelly

Supplies Used:


Kind of Batty Blog Hop Day 3!


Hey Friends! 

Thanks so much for stopping by today! If you came from Catherine's blog, you're in the right place! And you know what?! It's totally okay if you're here just for the chance to comment and win prizes. Cause.....I would totally do the same thing LOL!

Today I'm sharing two more cards featuring products from the newest release, and you can find the entire kit and caboodle of awesome products right here!

Let's get to the cards!

Are you a DIY-er? I'm not really.....to be honest, I spend so much time crafting that the thought of coming up with other ways to do DIY stuff around my house makes me want to take a nap! But you can combine the DIY mindset into the crafting mindset and guess what you get?

A DIY Cover Plate!

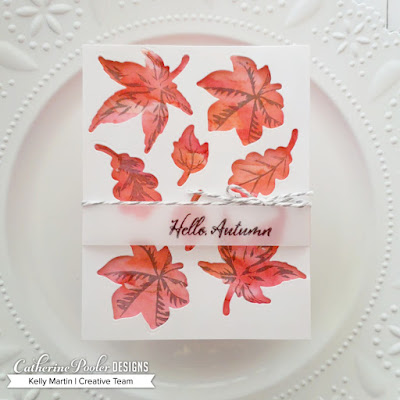
Just take your leaf dies from the Hello Autumn set and die cut them repeatedly across a piece of 4.25 x 5.5 inch cardstock and, voila! You've got yourself a die cut background made from your DIY cover plate.


Start off by creating a background of some kind (I choose to create a watercolor background from various Catherine Pooler inks), and then mount your die cut background piece with foam tape, adhere it on to your watercolor background, and you'll be set to go! Just add a sentiment (I chose to emboss a greeting from the stamp set on to a strip of vellum), and then you've got yourself a beautiful card!


One additional thing I did on this card was stamp the inside layers of the leaf images with the new Twilight ink, to give some added depth and dimension on the leaves. I also added a bit of twine to tie in the gray shades on the leaves.

Okay next--who doesn't love a good rainbow card?! This card was so much fun to make, and it was REALLY easy!


I stamped the Angled Squares background stamp on to a 4.25 x 5.5 inch piece of watercolor cardstock with a light water-soluble ink.

I then smooshed various CP inks on to an acryllic block, picked them up with my waterbrush, and then painted them on to my cardstock, following the lines of the stamp to create the bands of color.

After the background was completed, you can kick it up a notch and add some details with a white gel pen!

I stamped the "kind" word from the Kind of Wonderful set and then colored in the tiny floral images with sparkle markers, and then I used the Three of a Kind die to cut out the word before gluing it on to the shadow piece that the die cuts out. I chose to cut my shadow piece out of vellum.


I adhered the entire kind word (with the vellum shadow piece) on to my background, and then chose to add a couple words on to a separate white strip and glue that down as well. I then trimmed down the panel a bit and glued it on to a cut and scored 4.25 x 5.5 inch card base.

At this point, you can add a finished edge along the top and bottom of the rainbow panel however you want! I chose to tie in the black sentiment by adding strips of black washi tape.
Thanks again for joining us on another day of blog hops!


Hop along to each blog today and leave a comment for a chance to win a $25 gift certificate to the Catherine Pooler Shop! Winners will be announced on Monday, August 20. 

2. Kelly Martin (you are here!)

Supplies Used:

Stamps: Kind of Wonderful, Angled Squares, Hello Autumn
Accessories: Copic Spica Glitter Pens, Twine

Kind of Batty Blog Hop Day 2!


Hey Friends!

You guys--this release is so fun! I am not normally in to Halloween products, but these stamps sets are SO STINKIN' CUTE AND FUN!

So let's get right to the cards!

For this first one, I stamped the most detailed layer of the Rose Garden stamp set images on to watercolor paper with various CP inks. I then used a water brush to spread out the inks to create a loose watercolor look.


To create some added depth and variation, I then stamped over the image with white pigment ink, which caused the detailed lines to blend in even more, but still to an extent that they were contrasted.

Here's my advice for doing your own thing on watercoloring: Don't give up! After you've finished painting the flowers, cut them out and I promise it will already look 100 times more like a flower!

So cut out all the flower images and then set them aside.

Then create your background! I used a CP stencil and the new Sandcastle ink to create the background. I cut it down to a 4.25 x 5.5 inch card panel and then glued it on to a cut and scored 4.25 x 5.5 inch card base. I then trimmed down some scrap pieces of patterned paper I had in my stash and glued them on to the card base.


I then glued my roses on to the card, stamped a sentiment on to white cardstock, and then cut down the sentiment piece before gluing it on to my card to finish things off. Here's another tip: To add some variation and dimension to your card, choose different elements to mount with foam tape, while choosing others to lay flat on to the card.

For our second card, I broke out some of the dies from the Everything But the Broom set and went to work! I cut out several pieces and covered them with black ink, then set them aside.

To create the simple background, just use various CP inks and a flat paintbrush and paint stripes on a watercolor panel. I cut down the panel and glued it on to a cut and scored 4.25 x 5.5 inch card base.


I glued down the die cut pieces to the card and then stamped a sentiment. I cut it down and glued it down flat on the panel.

I added some details to the die cut pieces with a white gel pen, but....HAVE YOU FIGURED IT OUT YET?! These pieces are arranged to make this image look like an actual witch. I added some images from the set to fill in the background and finished it off.


Folks, this is not how I usually do card making, so this design idea was totally and completely outside the box. But so worth it!

Thanks for enjoying these cards today, and here are the details of the hop cause you have some chances to win PRIZES!


Hop along to each blog for a chance to win a $25 gift certificate to the Catherine Pooler shop! A winner will be chosen from each day of the hop and all winners will be announced on Monday evening, August 20.

1. Catherine Pooler
2. Chrissie Tobas
3. Susan Powell
4. Karen Baker
5. Jen Carter
6. Jenny Colacicco
7. Ashlea Cornell
8. Kelly Martin (you are here)
9. Ardyth Percy-Robb
10. Lydia Evans


Thanks for stopping by today and happy hopping!

Kelly

Supplies Used:

Stamps: Everything But the Broom, Rose Garden
Stencils: Perfect Vine
Dies: Everything But the Broom
Inks: Royal Treatment, It's A Girl, Daydream, Sandcastle, Over Coffee, Midnight, Orange Twist, Grass Skirt, Grape Crush

Tropically Yours Release Day!


Welcome back, friends!

Thanks for joining me today as I showcase these ridiculously fun products from the newest Stamp of Approval Tropically Yours collection! You can find the new collection here.


Confession: I have never really been crazy about flamingoes. I think my problem is that I start following a trend approximately 5 years after it's reached its peak of obsession. What can I say? I was always a late bloomer, so that's my excuse.


Anyway, flamingoes seem to be very on trend these days, but I've never really gotten hooked on them.


Until this SOA collection.


These flamingoes are just so stinking cute! I had so much fun coloring the images after I stamped them out. I colored them with my copics and then used the coordinating dies to cut them out.


I also stamped the water and grass images from the same set, die cut them out, and then set them aside as well.


I trimmed down a card panel to be 4 x 5.25 inches, and then adhered all my images to that panel. I also added the sentiment and then set off to create the card base.


I cut and scored a card base to be 4.25 x 5.5 inches, and then I used the border image from the stamp set to create the border on the left edge.


I then trimmed down my card panel with my flamingo images a bit more...I think I ended up trimming off about .25 inches from the right side of the panel.


When you're creating a card and you feel like it's falling a bit flat or looking a little boring, you can pull out the same secret weapon that I do--coordinating borders/edges. I used one of the copic markers I used to color my flamingoes to color the right edge of my card base. This gives a finished edge and brings the whole card together!


I mounted my card panel with fun foam and then glued it on to my card base to finish everything off.


Thanks so much for stopping by today and happy crafting! You don't want to miss this fantastic collection because the awesomeness *literally* cannot be contained sometimes. (That means that the collection sells out quickly!). Your wallet might scream but GO ON!! You can do it!


Kelly


Supplies Used:
Stamps: Stand Tall
Dies: Stand Tall
Inks: Grass Skirt, Fiesta Blue, Midnight
Coloring Medium: Copic Markers